 Electronics")
How To Control Your WiFi LazyBone via Internet
If you have a WiFi LazyBone in hand. Now you can control it via internet. We released new version Android APP V2R3 which support WIFI or 3G internet control. What we need to do is add the configuration of dynamic DNS and port forwarding in the router.
Here is the guide:
1. We need to enable LazyBone DHCP first. (Default setting is disable DHCP mode).
AT command:
set ip dhcp 1
save
reboot
* if you don't know how to use AT command, please refer: How to configure LazyBone IP address
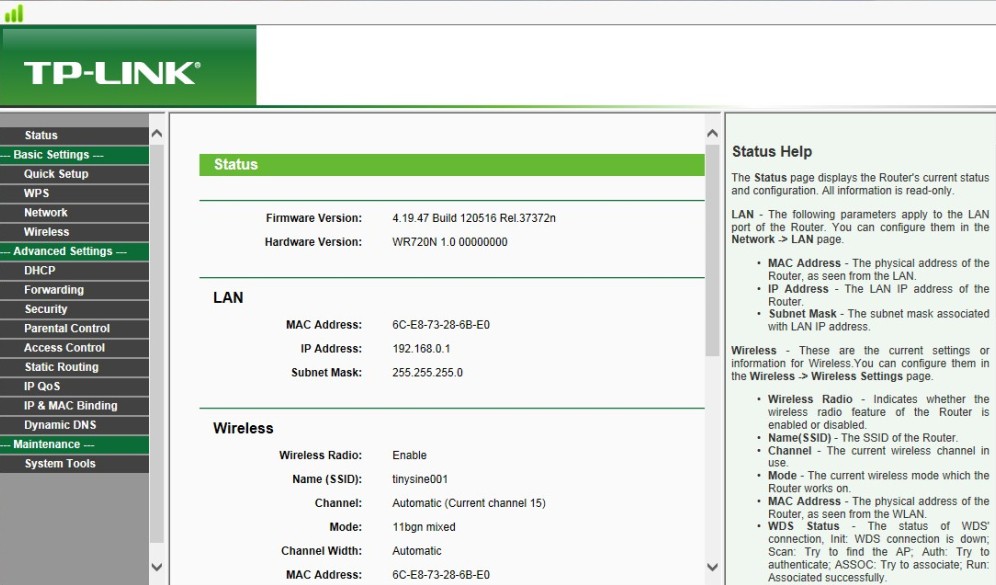
2. Login your router, Determine the ip of the router. By default this should be 192.168.0.1. (Some places might also use 192.168.1.1). open a web browser and type 192.168.0.1 as its url. You will come to a page where they prompt you a username password. Here we using TP-LINK WR720N.
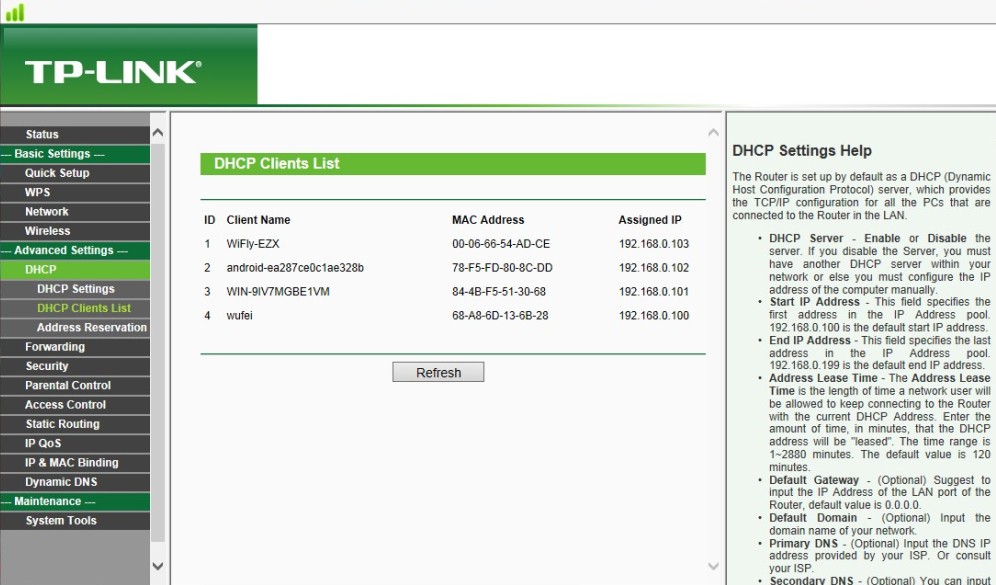
3. You will find Lazybone in the DHCP clients list. (Client name WiFly-xxx)
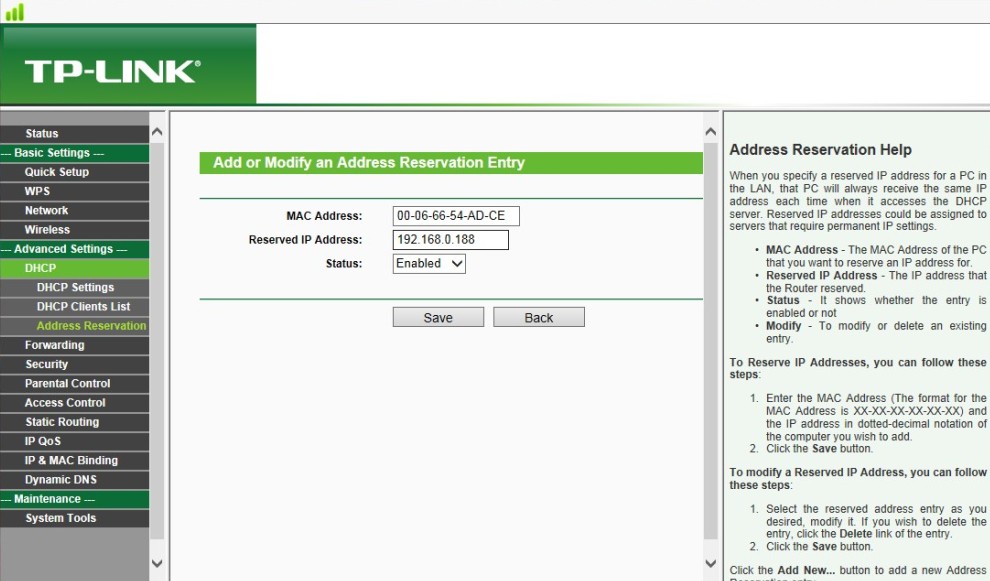
4. Assign a reserved IP address for the Lazybone.
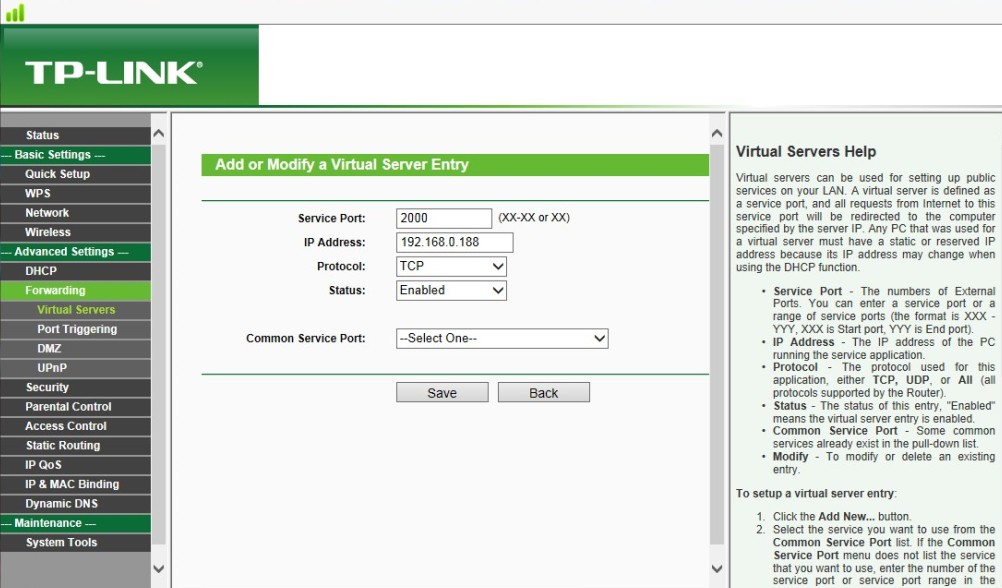
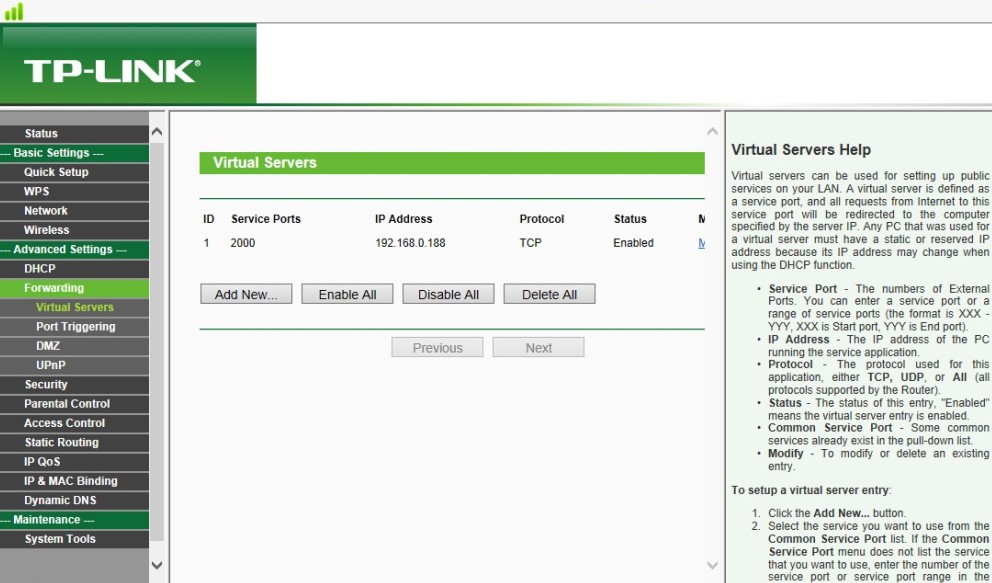
5. Set port forwarding
6. Set dynamic DNS, You need register first and launch your DNS. Different country and different router have different DDNS provider. In China, we use Oray.
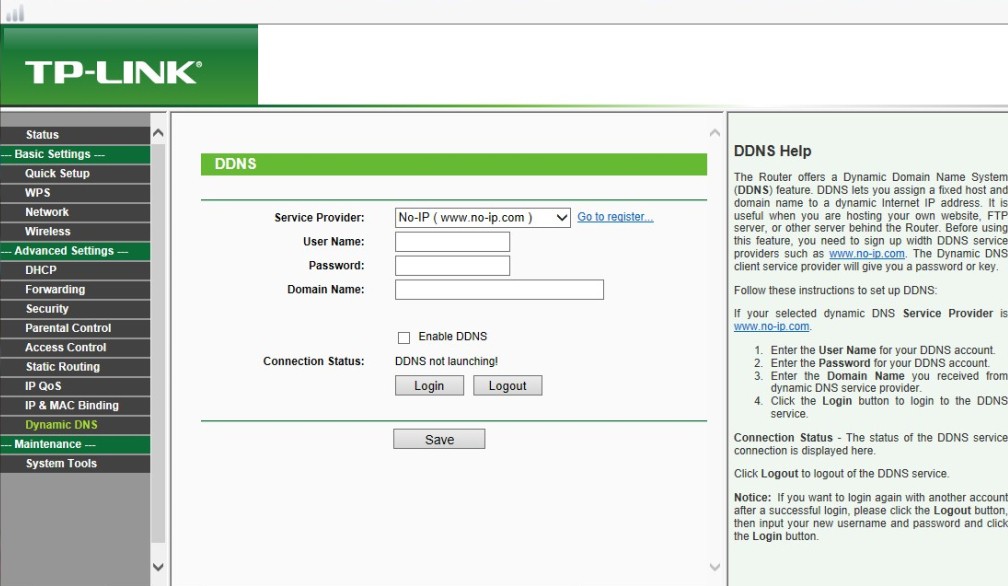
The connecting to no-ip.com is not stable in China, so we use oray.com here.

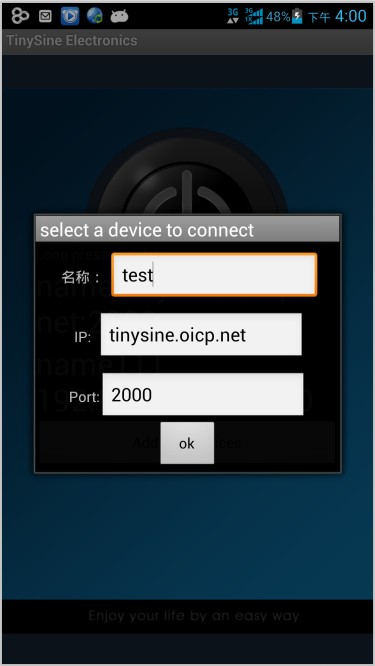
7. Open your phone WIFI or 3G. Input your domain name and port number. You can control your lazybone through internet now!
Notice: Some router default setting is auto offline after 15 minutes no data transimit. You need set it to always online.
Download:
Android APP V2R3 (+ internet control )