Electronics")
Remote Control a LED with Arduino 3G Shield
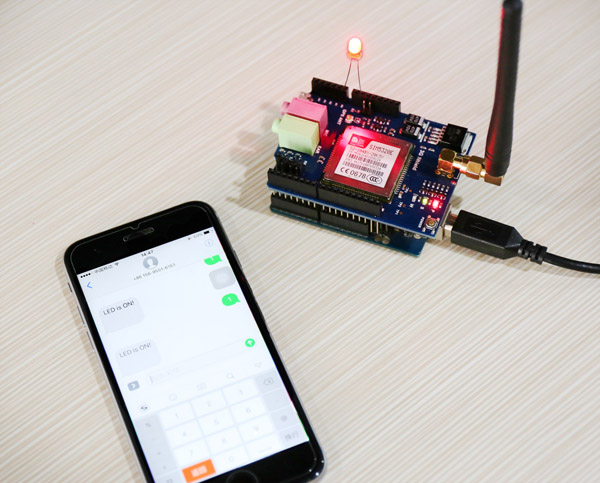
Here is a simple sample code of how to control a LED with Arduino 3G shield. User can control the LED ON/OFF by sending a simple SMS. This sample code can receive SMS and analyze the contents of the short message. If the contents of the message are ‘1’ or ‘1’ is at the beginning of the character, the A0 port on the Arduino board goes high level; and if the contents of the message are ‘0‘ or the characters begin with ‘0’, the A0 port goes low level. And you will receive a reply message after the LED state changed. Of course, you can modify the contents of any reply messages in the code if you want to. After processing the contents of the received SMS, it will delete this message. So you can use the phone to send ‘0’ or ‘1’ to control a LED connected to the A0 port.
Hardware and Software required:
- Arduino main board
- TinySine 3G shield
- Arduino Library
- SIM5320 USB drivers
- LED SMS control sample code
STEP1: Prepare hardware
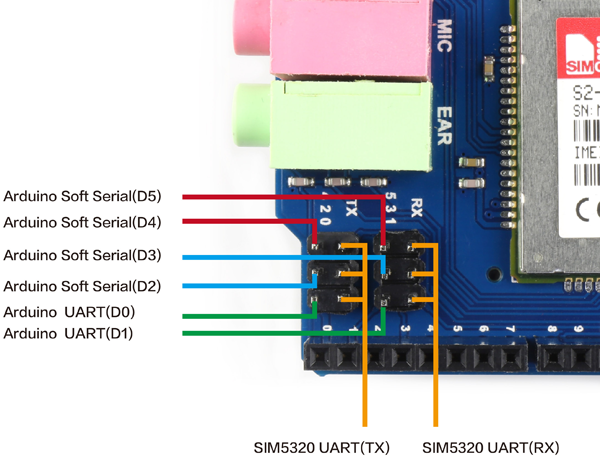
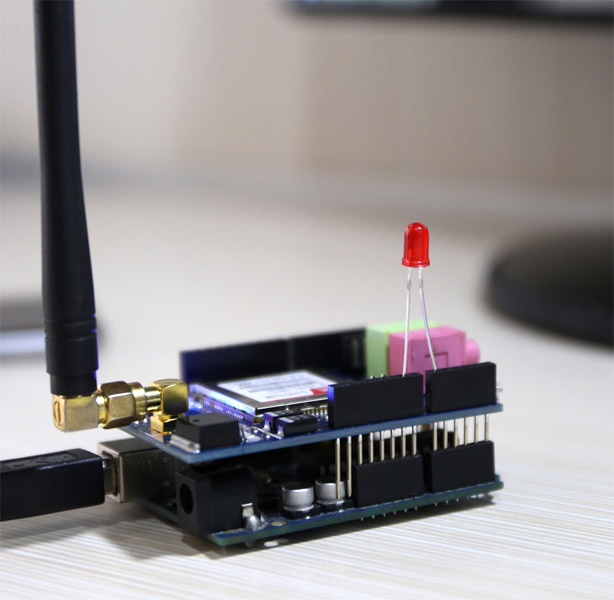
Insert a SIM card in the card holder on the back, and connect the GSM antenna. Stack the 3G shield on the Arduino board (Here we use Arduino UNO), then plug in the USB cable to the Arduino board. We'll use soft serial to talk to the module, and we choose TX-2, RX-3 on the 3G shield.
Connect an LED to the Arduino A0 port, Tthe positive of the LED to the A0 pin on the 3G Shield, and the negative to GND.
STEP2: Install Library
To begin reading sensor data, you will need to Install Library as follows:
- Download Arduino Library and unzip it.
- Copy the Adafruit_FONA folder to Arduino libraries folder. Typically in your (home folder)/Documents/Arduino/Libraries folder.
- Re-start the Arduino IDE if it is currently running.
STEP3: Adjust 3G Shield Baud Rate
If you are using 3G Shield for the first time, you may need to run the FONA3G_setBaud example to set the baud rate manually to 4800bps rather than 115200.
1. Plug in the USB cable from your computer to the Arduino board. And press the small POWER button for about 4 seconds to power on.
2. Select your board type and serial port from the Tools menu. Open up File->Examples->Adafruit_FONA->FONA3G_setbaud and upload to your Arduino wired up to the module.
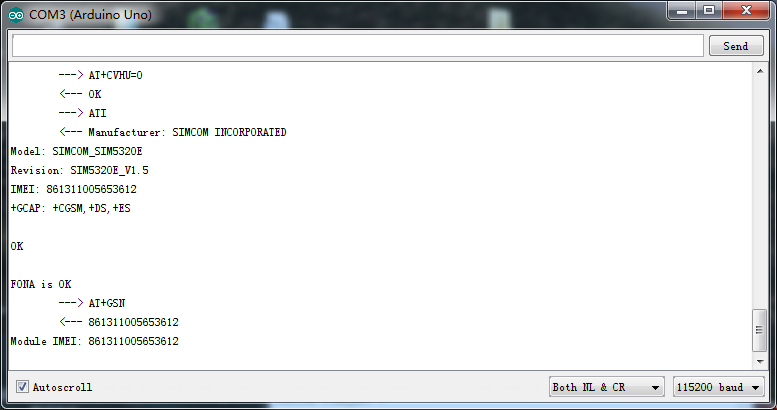
3. Once uploaded to your Arduino, open up the serial console at 115200 baud speed to begin the tester sketch. Wait a minute and when the serial port monitor print IMEI, then the baud rate setting completes.
STEP4: Load sample Code
1. Download sample code and unzip the file.
2. Select your board type and serial port from the Tools menu. Open up File->Open..., find the RecSMS code and choose Open. Then upload to your Arduino wired up to the module.
3. Wait a while, when the blue LED on the 3G Shield starts flashing, you can send the character ‘1’ to the 3G Shield (of course, you have to know the phone number installed on the 3G Shield in advance). Wait a minute, the LED will glow, and you will receive a reply message - "LED is ON!".If you want to turn off the LED, just need to send the character ‘0 ’ again, and you will also receive a reply message - "LED is OFF!".