Electronics")
How to Install FTDI Drivers
In this tutorial, we’ll show you how to install FTDI drivers on multiple operating systems. Although this tutorial was written using Windows 7, Mac OS X 10.6, and Ubuntu 13.04, the process should be very similar, if not exactly the same, for other versions/variations of these operating systems.
The FT232RL is one of the more commonly used ICs used to convert USB signals to UART signals. This process is very handy in that it allows you communicate with and upload code to an Arduino or other microcontroller without the need for an external programmer. TinySine carries a board called the FTDI Basic that conveniently breaks out the necessary pins on the FT232RL to perform these actions.
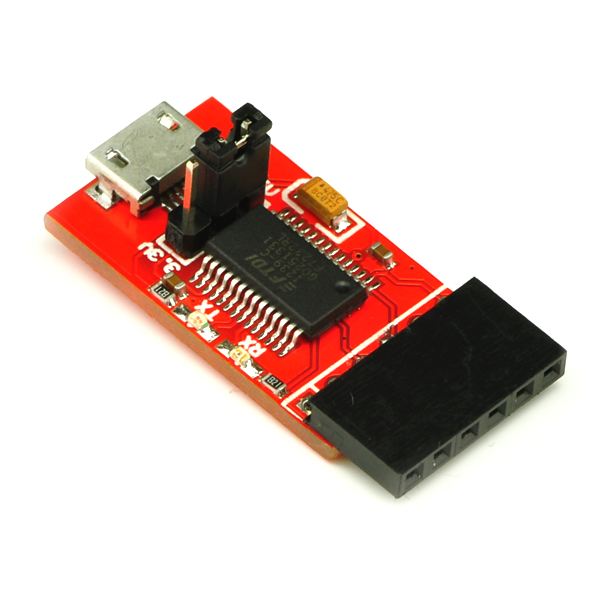
Tinysine 5V/3.3V FTDI Basic. Notice the IC–FT232RL
Windows
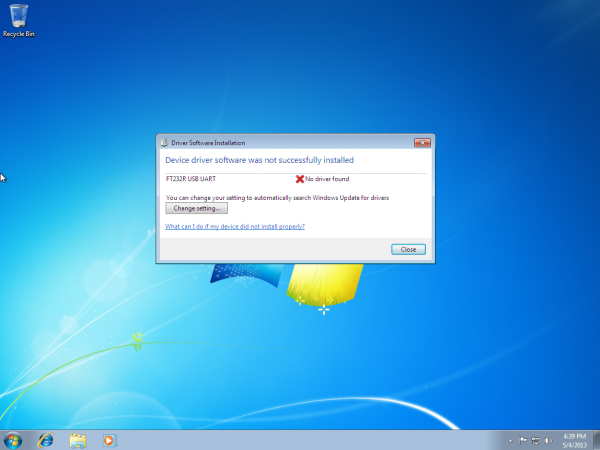
1. Plug in your FTDI using a USB cable. Windows doesn’t have the correct drivers, so let’s find them!
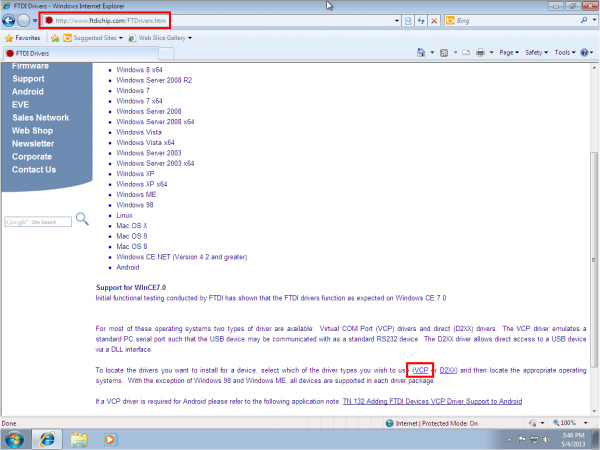
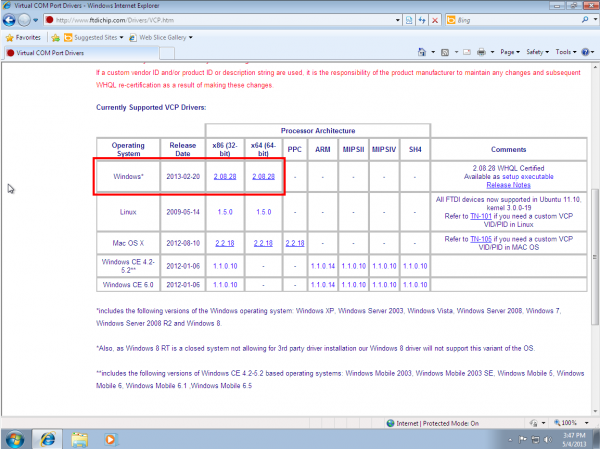
2. Navigate to the FTDI website, and choose the ‘VCP’ (Virtual Com Port) option near the bottom.
3. Now choose either the 32 bit version or the 64 bit version. Not sure which you have? The next steps will go over how to find that information. If you already know which version you are running, you may skip the next two steps.
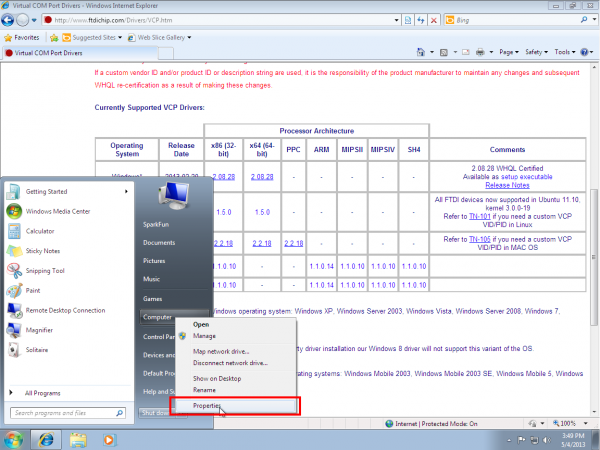
4. Open the start menu, right-click on ‘Computer,’ and left-click on ‘Properties’.
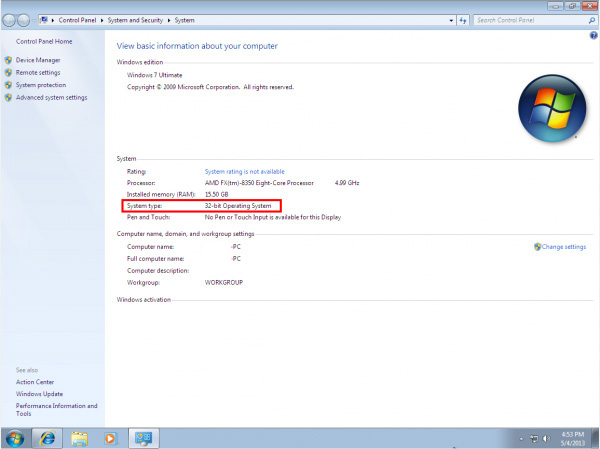
5. Look under ‘System type,’ to see which version you have.
6. Now go back to the FTDI site, right-click on the correct version, and save it to your computer. Remember where the files are saved. We’ll need them in the next step.
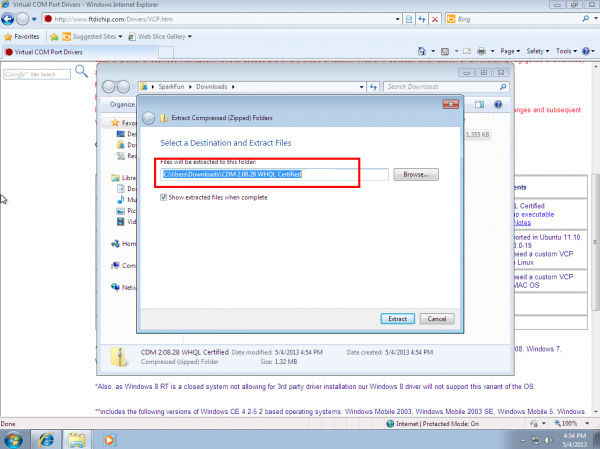
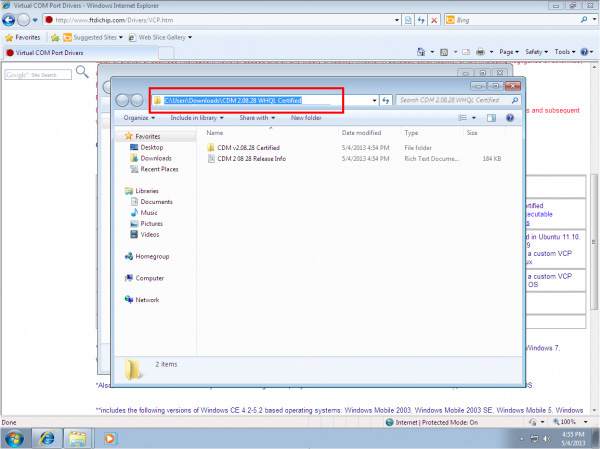
7. Navigate to the folder containing the files. They will be inside of a .zip file, so you’ll need to extract them. Right-Click on the .zip file, and choose ‘Extract All…’ When the next window appears, as shown above, pay attention to where it is extracting the files. Make sure that ‘Show extracted files when complete’ is checked, and click ‘Extract’.
8. When the extraction is complete, the folder is opened. Again, take note of this folder location. This is the one containing the drivers.
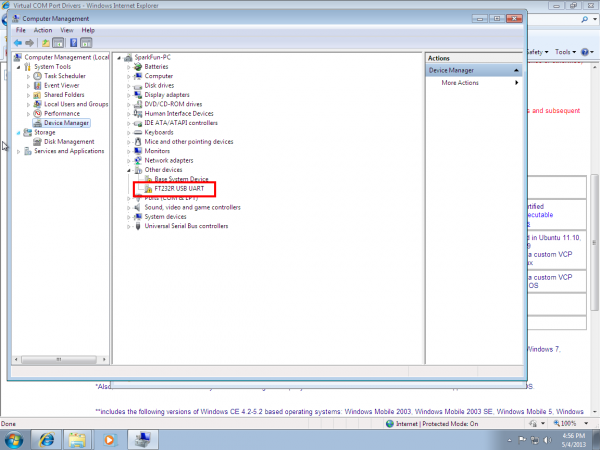
9. We’re almost there! Open the start menu, right-click on ‘Computer’, and left-click on ‘Manage’. You will need administrator rights to do this. If you aren’t an administrator on your computer, talk to the person who is and have them enter their credentials.
10. Left-click on ‘Device Manager’ in the leftmost column. Here is where we see the offending hardware. It has an exclamation mark next to it.
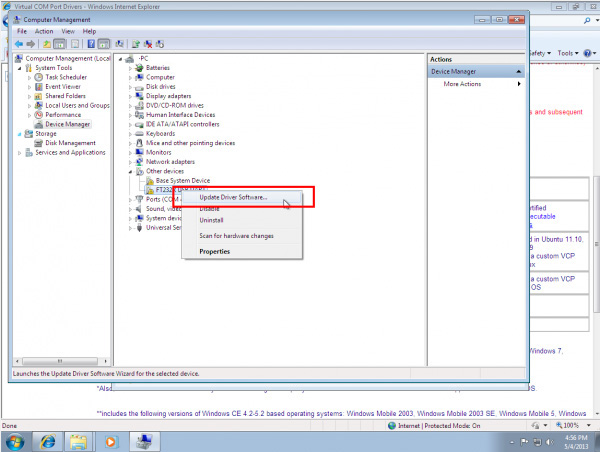
11. Right-click on ‘FT232R USB UART,’ and left-click ‘Update Driver Software…’
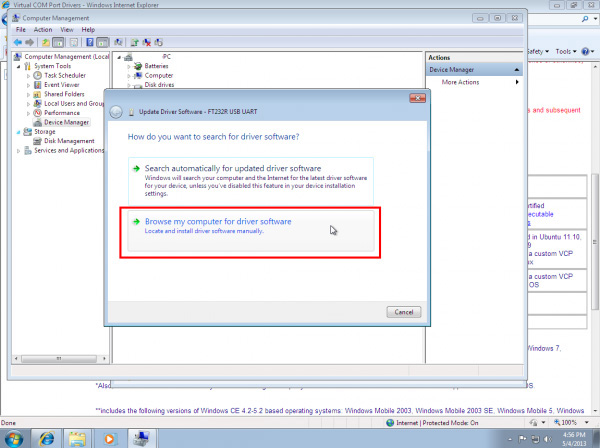
12. Now choose ‘Browse my computer for driver software’.
13. Left-click ‘Browse,’ and navigate to the location of the extracted files. Choose the extracted folder. There is no need to search any further in the folder. Then left-click ‘OK’.
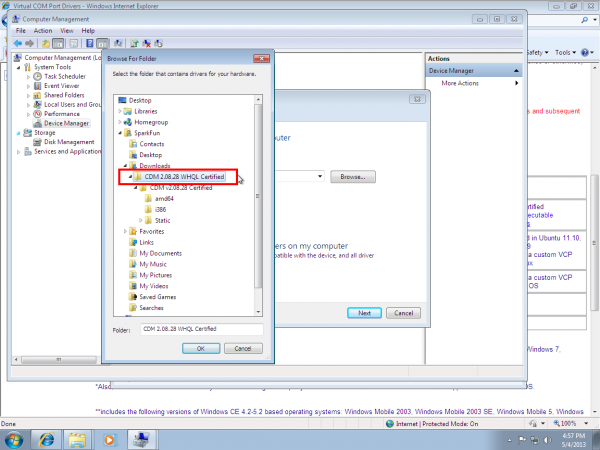
14. Make sure ‘Include subfolders’ is checked (very important!), and left-click ‘Next’.

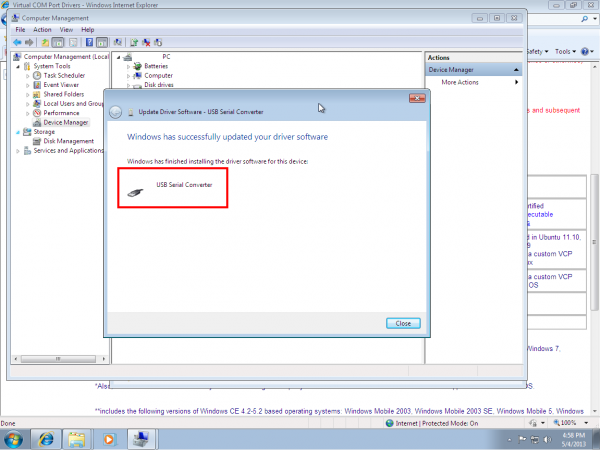
15. After a moment, you will see a success message! Left-click ‘Close’.
16. The Device Manager page will refresh and you will see a new item with an exclamation mark named ‘USB Serial Port’. You will need to install a second driver for the same device. Follow the steps 1-15, as before, and use the same driver folder too!
17. Once those steps are complete, you will see another success message! Left-click ‘Close’.
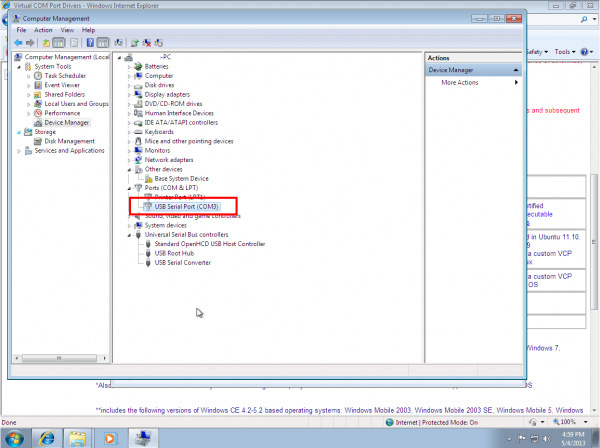
18. The Device Manager Page will refresh again and show ‘USB Serial Port (COMxx),’ where xx = some number. Congratulations, you now have the proper FTDI drivers and can begin to use your device!
Note: You should only need to go through this process once. Every subsequent FTDI device you plug in should now have these drivers associated with it. However, if this is not the case, you can follow these instructions again for other devices.
Note: If you have more than one FTDI device plugged in to your computer at the same time, all of the devices will show up under this menu. To figure out which device is which, look under the ‘Serial Port’ menu. Take note of the names of each device. Then unplug the device you want to use. Go back to the ‘Serial Port’ menu. The device you unplugged should no longer be listed. That is the device you want. Plug it back in, and select the device that has now reappeared. You can also check the Com port number in the Device Manger to see which device is associated with each Com port.
Linux
Note: The screen shot in this tutorial is from Ubuntu 13.04. The process should be very similar, if not exactly the same, for other versions/variations of this operating system.
1. Plug in the FTDI device to a USB cable.
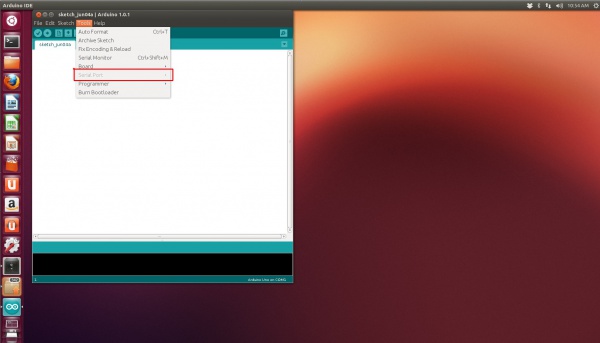
2. When you download the Arduino IDE in Linux, the download comes with the FTDI drivers bundled with the IDE. However, if you just open Arduino from the desktop, you’ll notice that, if you click on ‘Tools’, the ‘Serial Port’ option is grayed out.
3. To get around this, you need to open Arduino as Root using the terminal.
sudo arduino
4. Then, enter your password.
5. Arduino should open, and this time the ‘Serial Port’ menu is available.
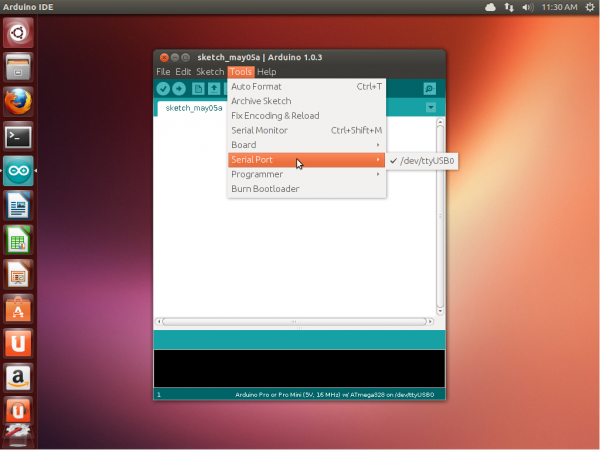
6. The FTDI device will show up under this menu. It should be named /dev/ttyUSB0. The number may vary depending on how many USB devices you have plugged into your computer. That’s all.
Note: If you have more than one FTDI device plugged in to your computer at the same time, all of the devices will show up under this menu. To figure out which device is which, look under the ‘Serial Port’ menu. Take note of the names of each device. Then unplug the device you want to use. Go back to the ‘Serial Port’ menu. The device you unplugged should no longer be listed. That is the device you want. Plug it back in, and select the device that has now reappeared.
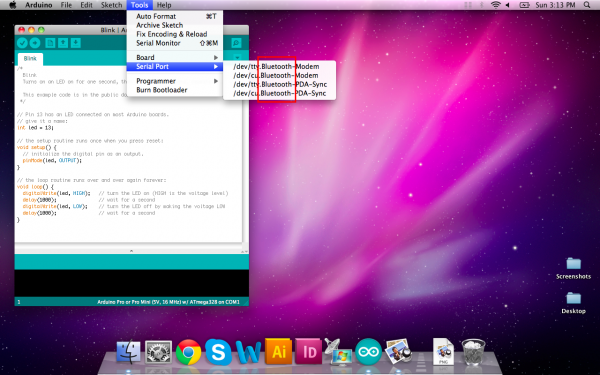
Mac
-
Most of the time, when you install Arduino on Mac OS X, the drivers are installed automatically. However, if there was a problem with the installation and you don’t see any options that include ‘usbserial’ under the ‘Tools -> Serial Port’ menu, then you will need to install the drivers. You may also need to install the full FTDI drivers if you are running OSX 10.10 or later. The factory drivers are not complete.
-
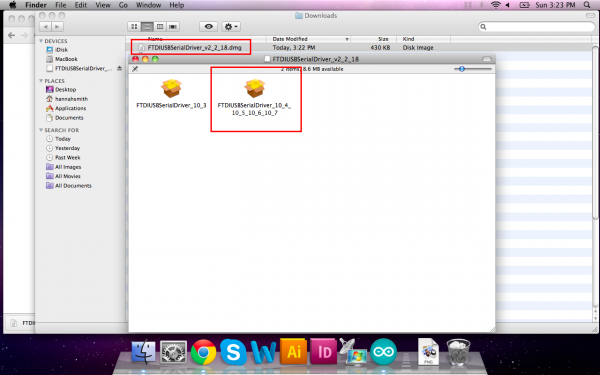
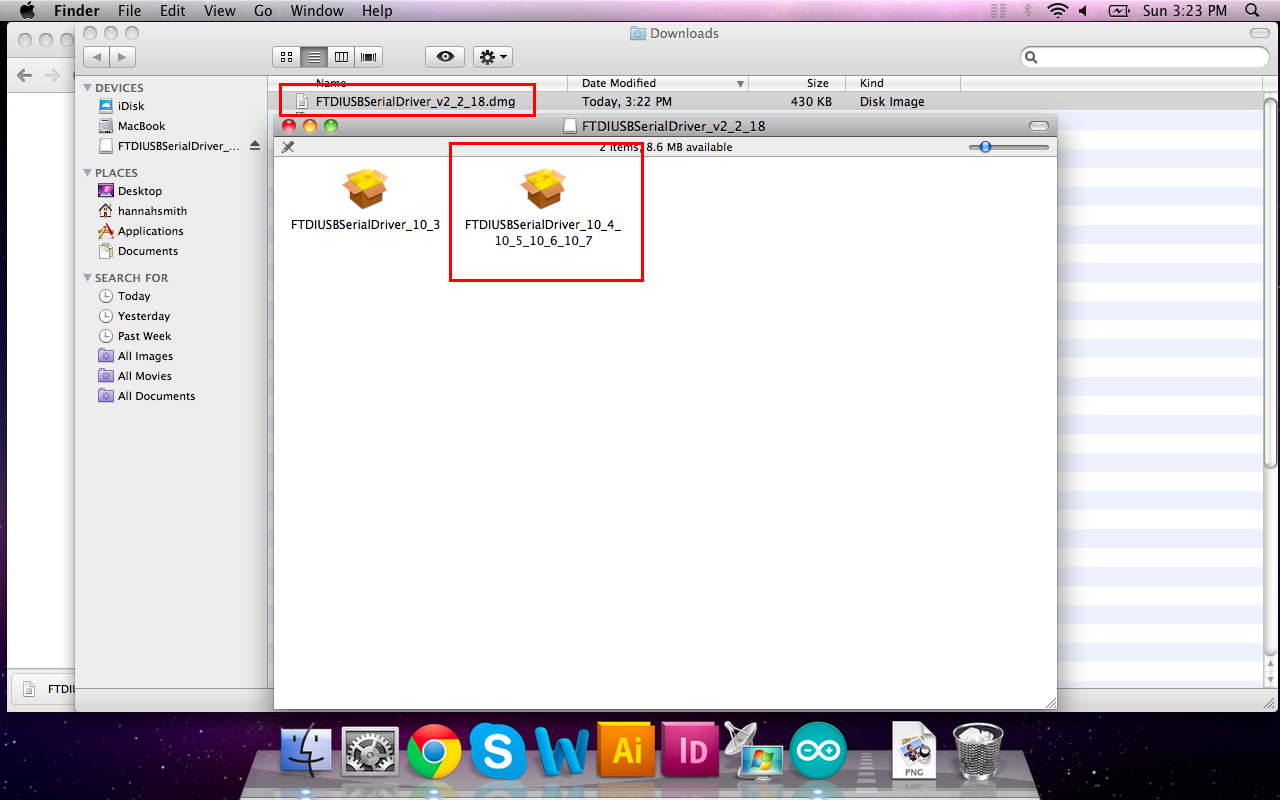
Download the driver installation here. Locate the file FTDIUSBSerialDriver_v2.2.18.dmg file that was downloaded to your computer, and double click on it.
If you are not sure which version of OS X you have, use the same process as before when finding the processor type. Click on the apple and choose ‘About This Mac’. You will then see Version 10.X.Y–use the 10.X to determine your system version.
-
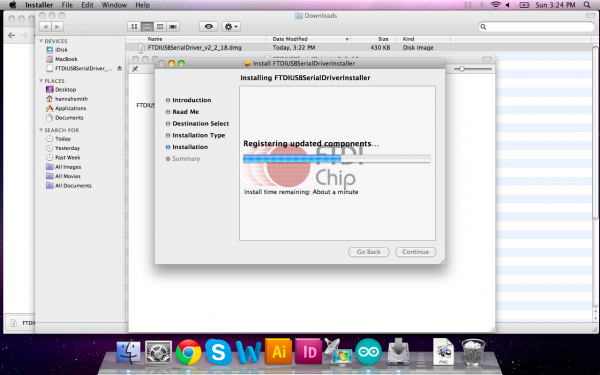
Continue through the installation, and wait for it to finish. Then click ‘Close.’
-
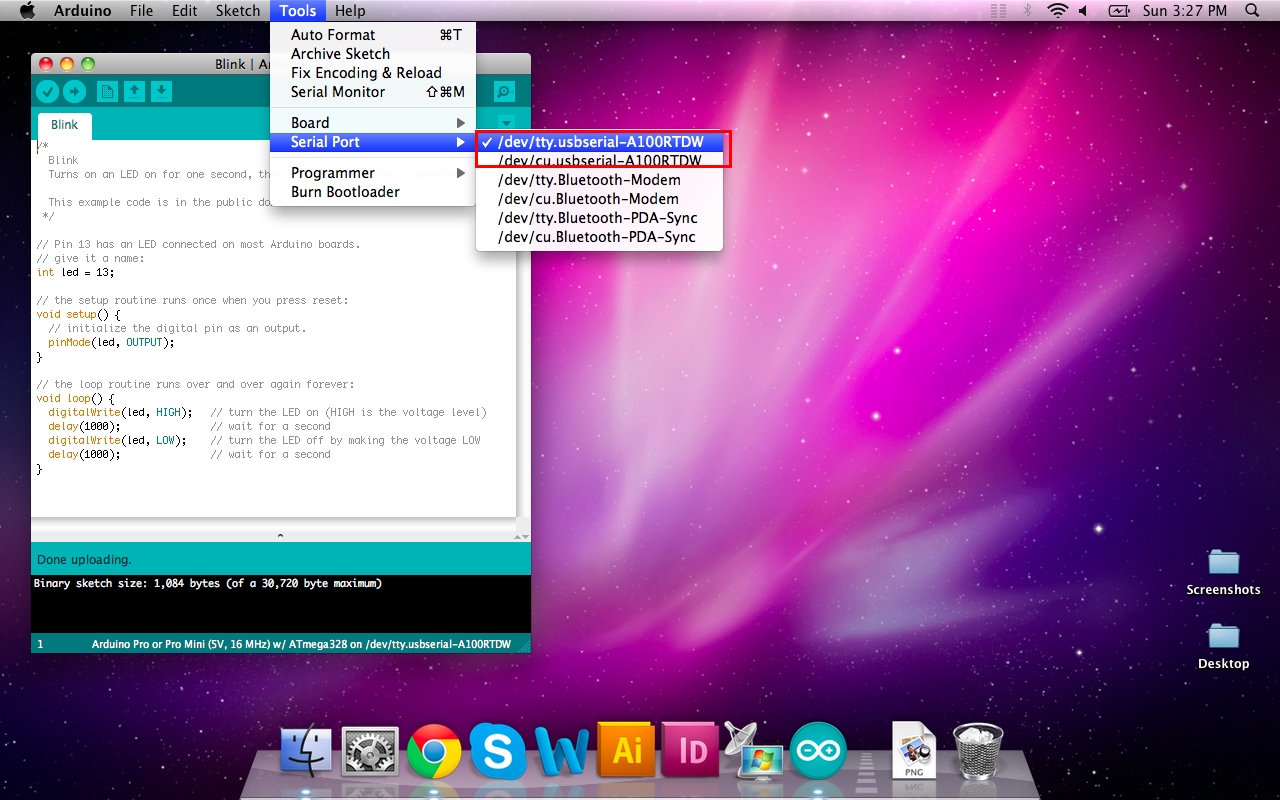
Now open the Arduino IDE. Under ‘Tools -> Serial Port’ you will now see a ‘usbserial’ option. Congratulations, you’re all set!


Note: You should only need to go through this process once. Every subsequent FTDI device you plug in should now have these drivers associated with it. However, if this is not the case, you can follow these instructions again for other devices.
Note: If you have more than one FTDI device plugged in to your computer at the same time, all of the devices will show up under this menu. To figure out which device is which, look under the ‘Serial Port’ menu. Take note of the names of each device. Then unplug the device you want to use. Go back to the ‘Serial Port’ menu. The device you unplugged should no longer be listed. That is the device you want. Plug it back in, and select the device that has now reappeared.
Unidentified Developer Error
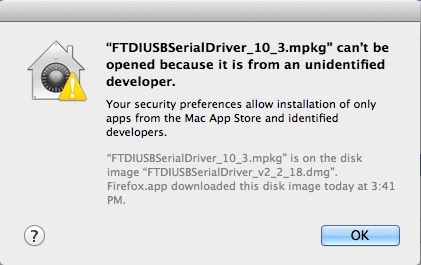
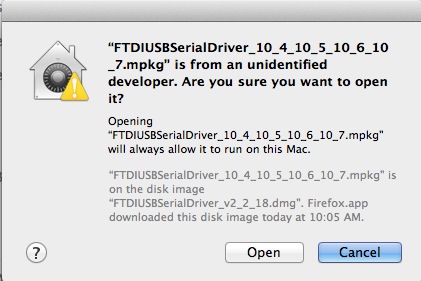
On newer versions of OS X, when you double-click the install packages inside the FTDI disk image, you may be presented with a very Windows-esque type error about not being able to open the files because they are not from an identified developers. This is very similar to the unsigned driver issue in Windows 8.
Quick Fix
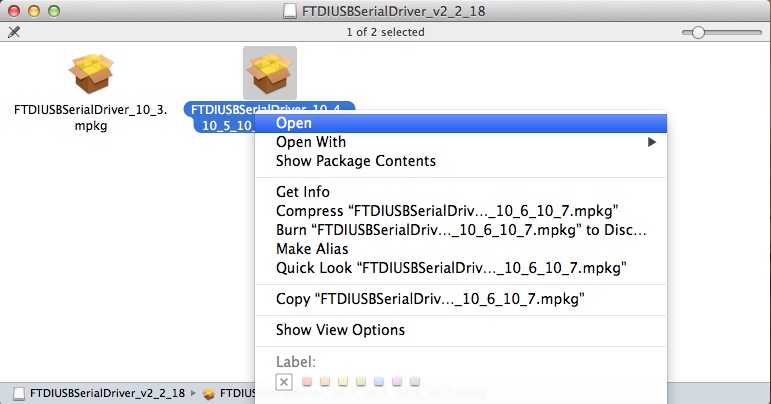
To get around this, simply right-click the package you want to install, or press CTRL + click, if you don’t have a right-click. Then select open from the menu.
You will then be given another window asking if you are certain. Click Open, and proceed with the installation as stated above.
In-Depth Fix
For a more permanent fix, you can follow these instructions. However, this method is not suggested as it leaves your computer vulnerable.
Open your System Preferences.
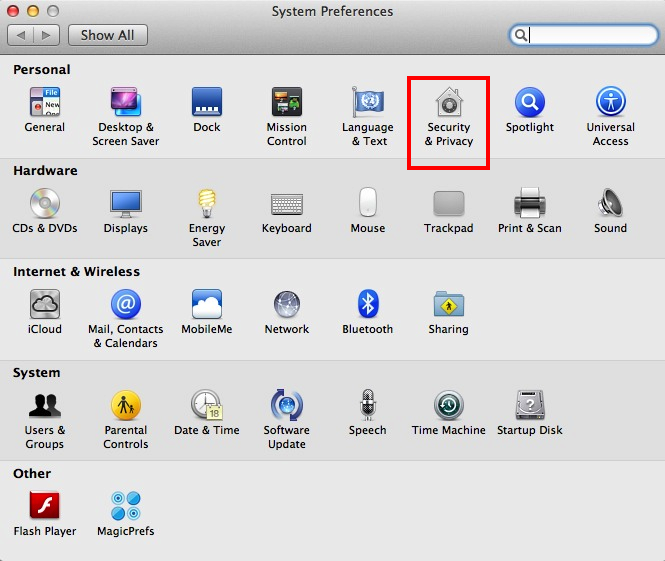
Once open, click the Security & Privacy icon.
Under the General tab, you should see a section about allowing the running of downloaded applications from specific sources. In preveious version of OS X, the defualt was set to Anywhere. However, the defualt setting is now Mac App Store and identified developers.
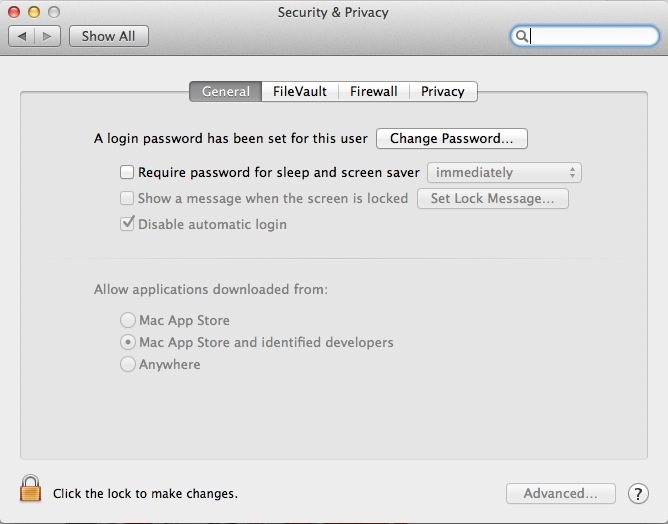
To use the FTDI drivers, you’ll need to set this back to Anywhere. First, you may need to click on the little lock icon and enter your admin password to make these changes.
Note for educators: You may need to get you network administrator to come and unlock the computer in order to install these drivers.
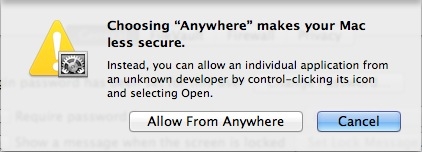
Once unlocked, click the Anywhere option. Another obnoxious window may appear asking you if you’re sure you want to allow this. Click Allow from Anywhere. Or, you can follow the directions in this window, if you don’t want to make your Mac “less secure.”
You should now be able to install the FTDI drivers.

FTDI Drivers and OS X Yosemite
With Mac OS 10.9 (Mavericks) and later, Apple has built their own version of the FTDI VCP driver into the operating system (AN134). However, there seems to be some conflict between drivers from FTDIchip.com and the ones inherent to Apple. Luckily, there is a solution to this problem, and it comes from FTDI directly.
Quick Fix
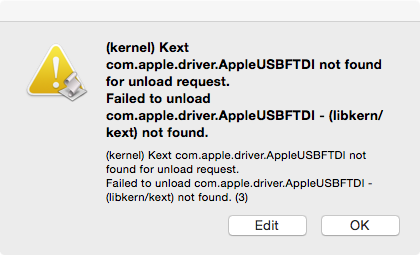
If you are trying to use the FTDI VCP Driver in your applications, it will not work due to a conflict between the VCP and D2XX drivers. In order to get around this, the Apple supplied Driver must be uninstalled. Plug in the FTDI device in question, and type the following command in a Terminal window:
sudo kextunload –b com.apple.driver.AppleUSBFTDI <ret>
In-Depth Fix
If the above doesn’t work, you may have better luck using this script from FTDI.
Clicking on this file will bring up the Script Editor on all Macs. The script can be run by clicking on the run icon (black triangle). Again, make sure your FTDI device is connected.
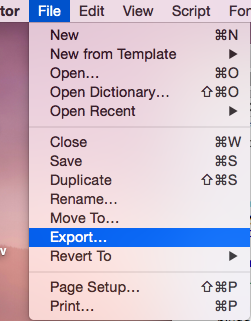
You can make this script into a clickable icon by exporting the script as an application. In the Script Editor, select Export… from the File pull down menu:
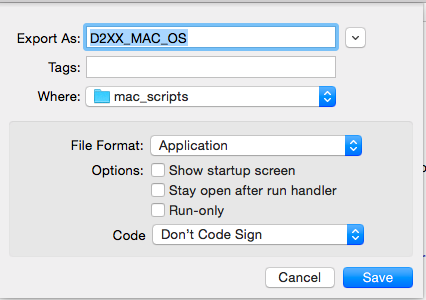
In the Export dialog, select Application as the File Format. You can choose any name for the application.
You should now have an automated Apple Script icon to use on your Mac. With the Apple supplied Drivers uninstalled, you may return to the top of this section and install the FTDI VCP Driver as needed. Repeat this process for any other FTDI devices you are using. You may need to repeat this every time you restart your computer.
If you receive this error, it means that the driver has been uninstalled already, and you will need to install the FTDI VCP Driver, as stated above.