 Electronics")
How to set up the new WIFIBee ESP8266 module
Tinysine WiFiBee ESP8266 is a new WIFI module which based on ESP8266, it’s more reliable and easy to use and cost also lower, you can use it on our relay boards or dimmer, here are two methods to configure module’s network.
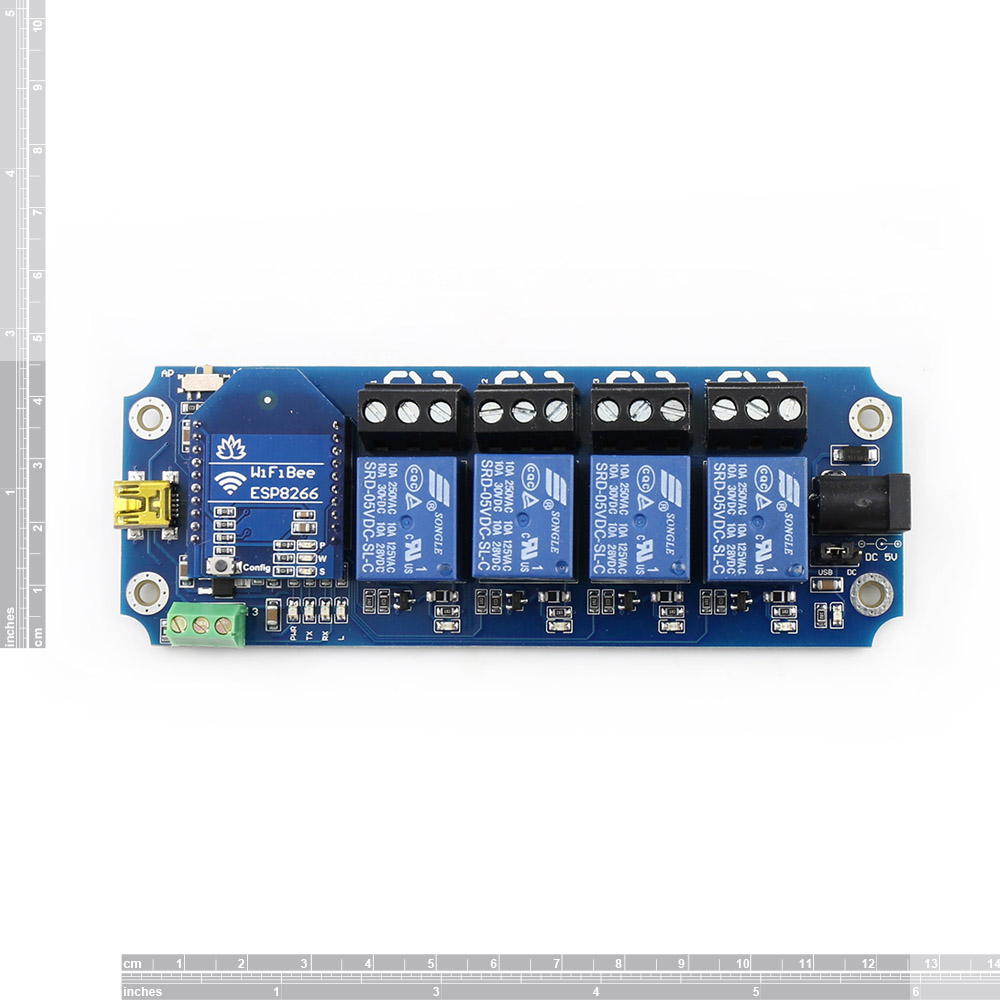
Here we plug the WiFiBee ESP8266 on our relay board to show how to configure and use the module.
Step1: Plug the module on the board and power on the board. Please check the power jumper, select USB power or DC power.
Step2: Configure the WIFI module to let it join your home WIFI. Here we have 2 methods can configure the module. You can use a smartphone APP or use web browser configure it.
Configure via Esptouch APP(recommended)
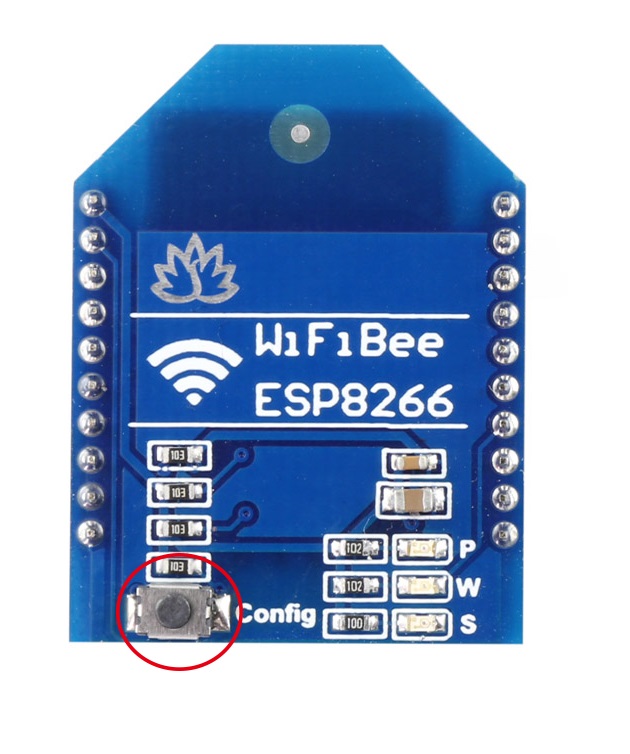
1. Quick click 'Config' button, Blue LED(W) state change to fast blink.
2. Let your phone connected with your home WIFI, then open Esptouch APP
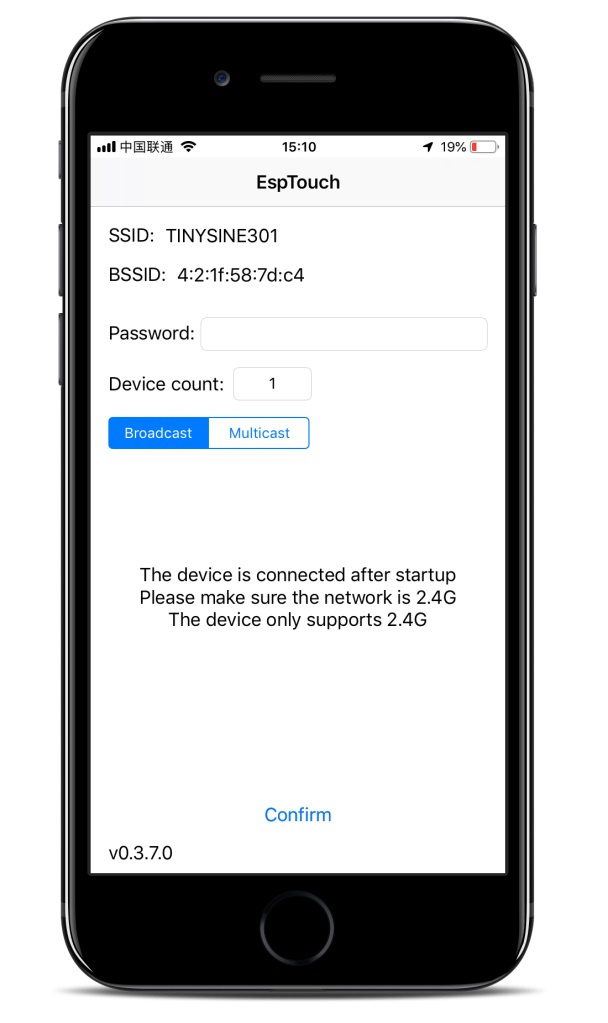
3. Input the WIFI password and click “Confirm”. Our WIFI password is 000000000. You need input your password.
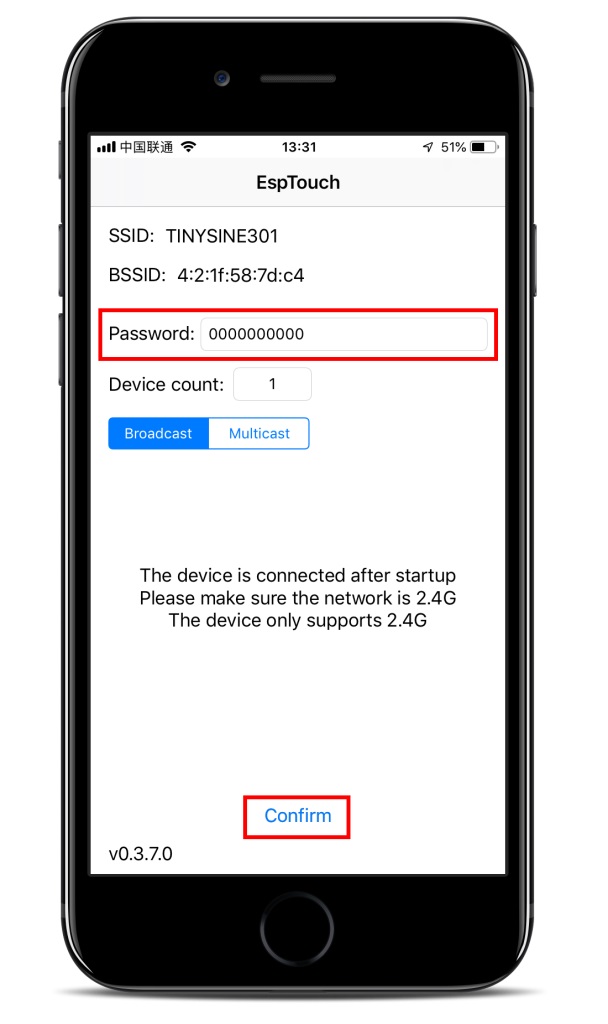
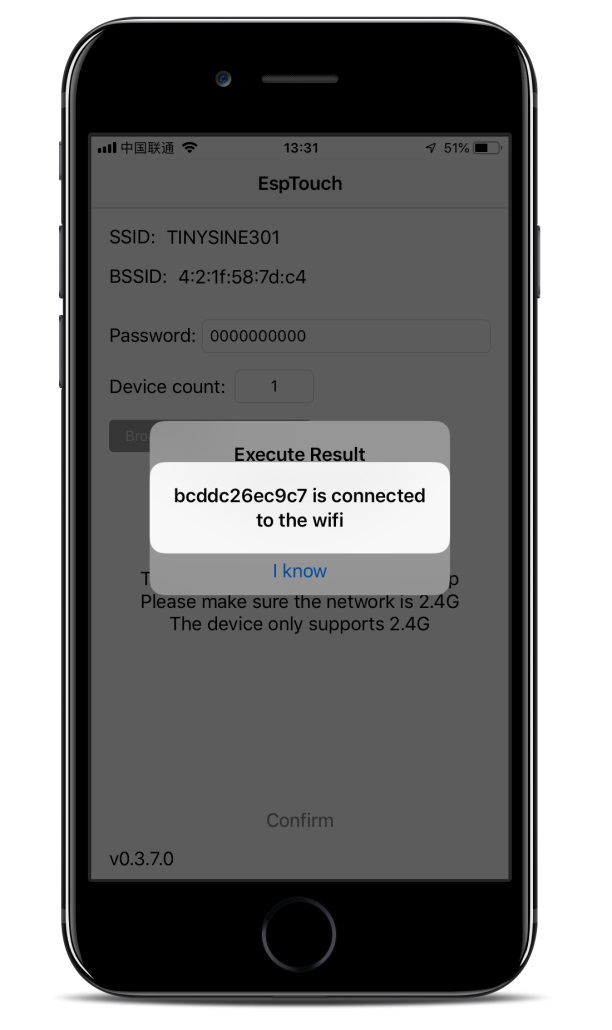
4. Wait a while, when app shows “xxxxxxxxxxxx is connected to the wifi”(xxxxxxxxxxxx is module’s mac address), it means you have completed the configuration, and blue led on the module becomes slow blink, click the screen you will get the execute result, IP address is assigned by your router automatically!

Configure via web browser in AP mode
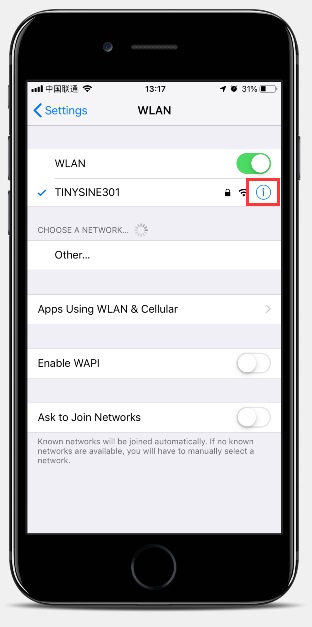
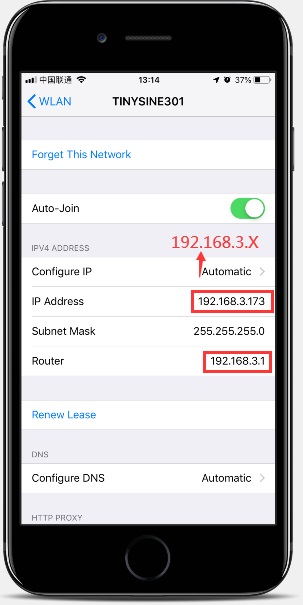
1. Open your phone or computer’s WiFi settings,choose the network you want to connect to.Then look at the network details for the network's IP address and router gateway.
2. Press and hold Config button on WiFiBee ESP8266 untill the blue led(W) fast blink, then release the button, now the module has entered AP mode.
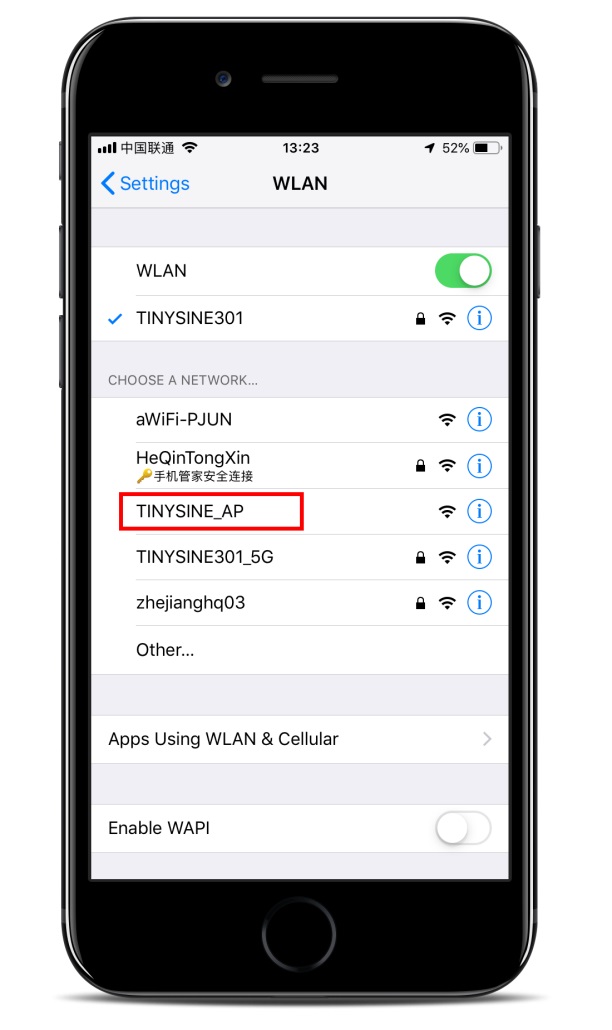
3. Open your phone or computer’s WiFi, you will find a network named as “TINYSINE_AP”, connect it.
4. If you use iPhone or mac os, it will open a configure interface automatically. If you use an android phone or Windows computer, you need to open a browser and input IP address 192.168.4.1, it will also goes into the configure interface.
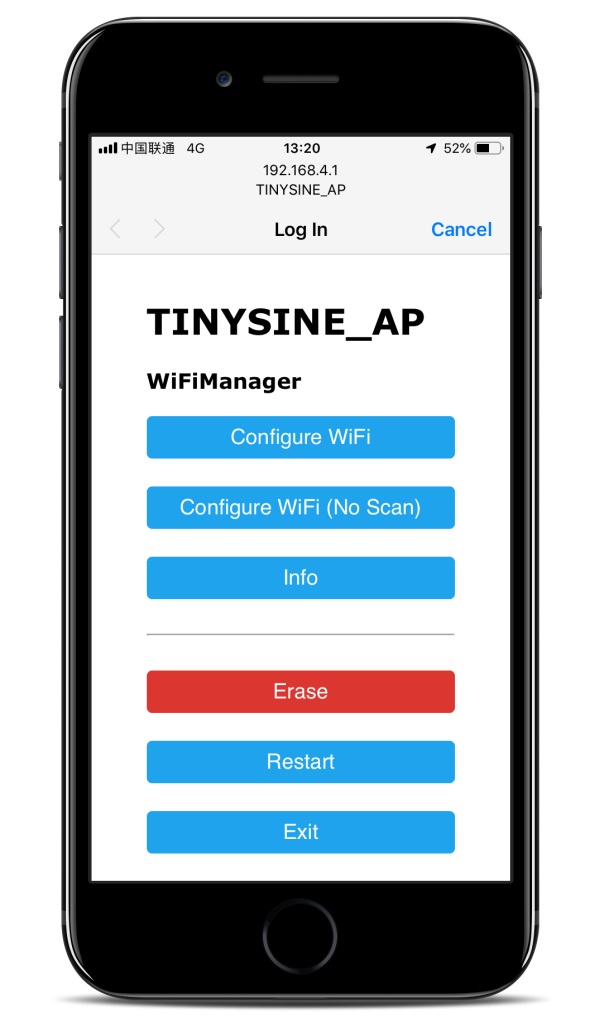
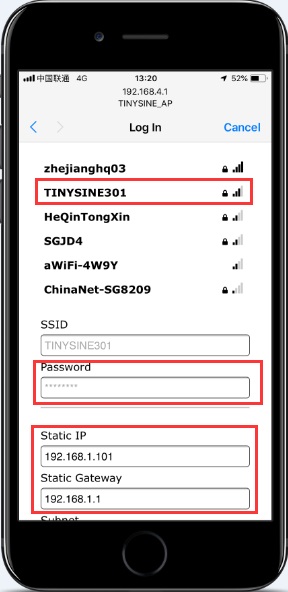
5. Choose the first option - Configure WiFi, select your network from the list and input its password. Assign a proper IP address for the module and input router’s gateway(Refer to step 1), then click “Save”.
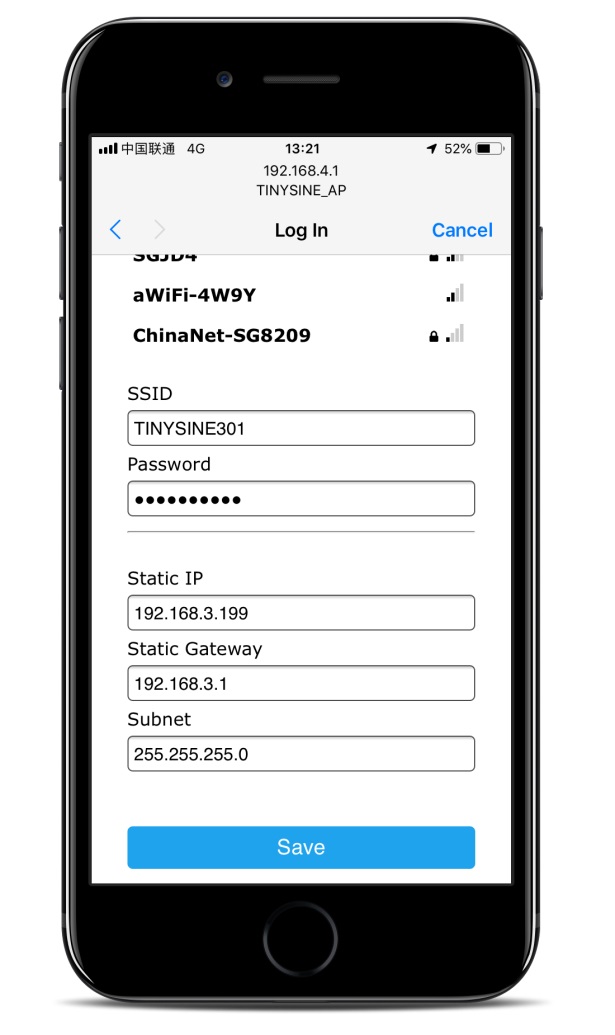
6. Wait for a while, when the blue led becomes slow blink, it means you have configured the module successfully!
Now you can open the relay control APP and input the correct IP address and control it.